Block Ads on Android Using Private DNS
Please ensure that your phone is running on Android 9 Pie operating system. If it’s running on Pie, then follow some of the simple steps given below.
Step 1. First of all, open your Android’s app drawer and tap on ‘Settings’
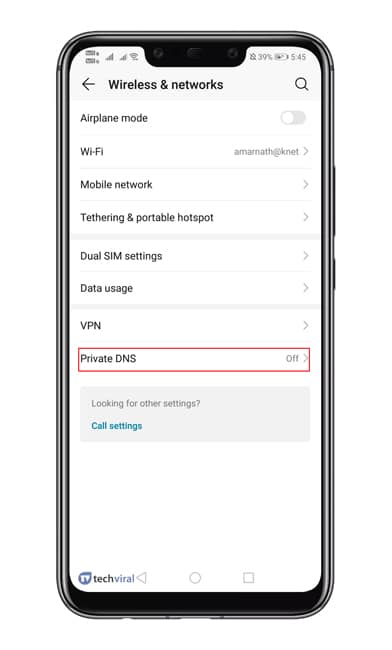
Step 2. Under the Settings tab, you need to select ‘Network & Internet’ or 'Wireless & Networks' or 'Conections'.
Step 3. Under Network & Connections, Click On 'More connection settings '.
Step 4. Under More Connection Settings, select ‘Private DNS’
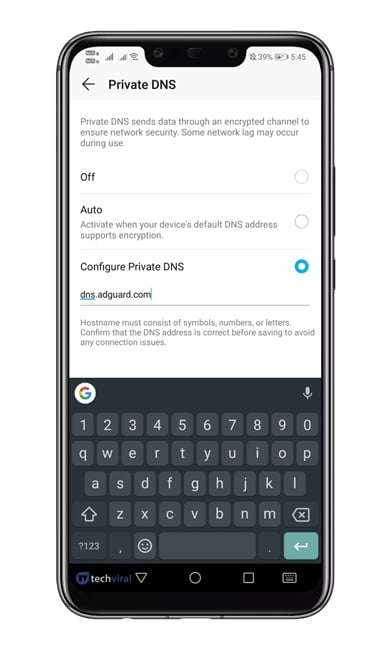
Step 5. Now you need to select the option ‘Configure Private DNS’
Step 6. Under the hostname, type in 'dns.adguard.com'
Step 7. Save the settings and open the Google Chrome browser.
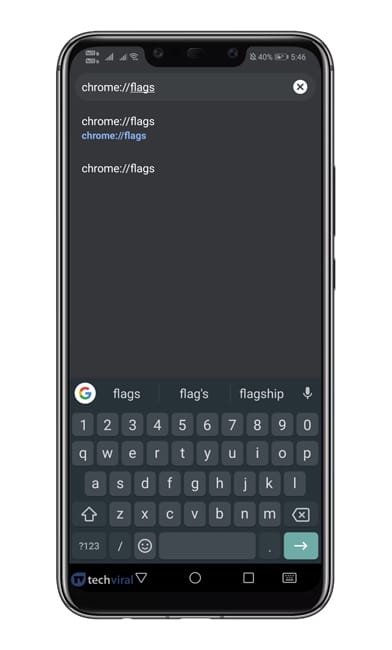
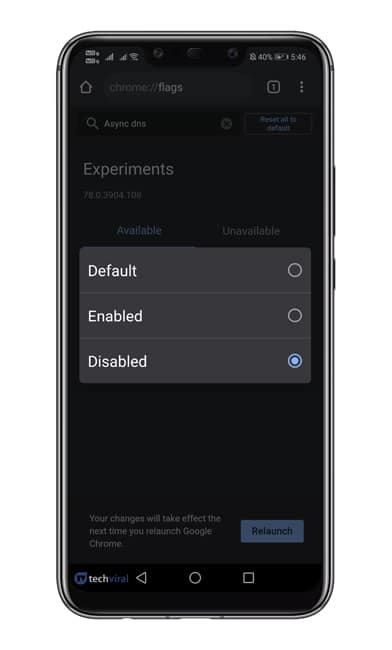
Step 8. On the URL bar, enter "Chrome://flags" and hit Enter.
Step 9. Now search for ‘DNS’ and then disable the ‘Async DNS’ option.
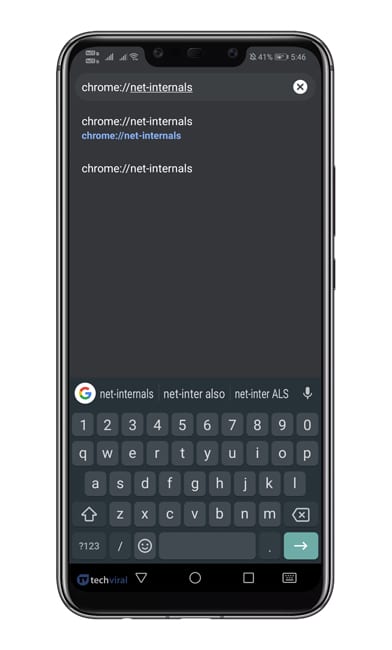
Step 10. Now enter "chrome://net-internals" in the URL bar and hit enter.
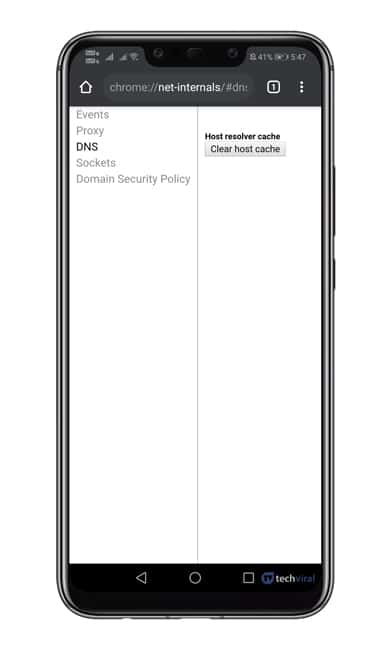
Step 11. Select the DNS tab, and then tap on ‘Clear Cache’ option.
That’s it! You are done! Now restart your chrome browser to apply the changes.
So, this is how you can block ads using the Private DNS feature on Android 9 Pie. The method shared above would remove ads from every webpage. I hope this article helped you! Share it with your friends also.

Block Ads with Ad-blocking DNS servers on your router
If you’re searching for ‘Adblocker for Android Box’ or other Android Smart TVs, the best way to go about it is setting up an ad-blocking DNS server over your router. Basically, this will block ads on every device connected to the router. And since you’ll need to connect the Android Box to a Wi-Fi network (router) anyway, it makes sense to block ads on the entire network.
To make it work, we’ll be using the popular AdGuard DNS server, which allows you to block ads, pop-ups, and others on your router.
- Make sure your computer is connected to the router
- Open a new tab on your browser
- Into the address bar, enter the IP address of your router and hit You should find this on the label of your router. If not, use the general IP address: 192.168.0.1 or 192.168.1.1.
- You’ll be asked to enter your login details to sign in to the router. Provide it and proceed to the next page.
- On the router’s configuration page, go to Network > Advanced > DNS Server. The steps may vary on your router. Just look for the DNS server settings there.
- You may take a screenshot of the existing DNS server settings, in case you need to revert your changes later.
- After that, replace the existing DNS server with the given addresses from adguard-dns website
- Finally, Save the changes and reboot your router and the computer.